Creating that 75-Year-Old Look with Your Neglected Photo Frames.
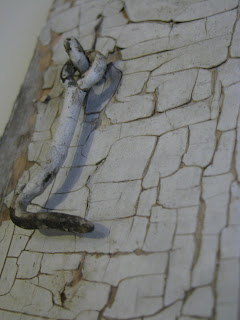
I am ALWAYS searching for great ways to 'trick the eye' around here. Almost like a Set Designer would do for his stage, I do here at home. Set the Scene! A lot of what I find attractive in the realm of decor for the home centers around one main theme: OLD. I love the way age presents itself in furniture, glass, metal, dolls, linens, etc...I just love old things. As I ponder with a searching eye through many antique shops and malls, I notice one element of age that I am always drawn to...to the point of obsession: chipping paint on weathered surfaces.
 |
| This Old Window has a Beautiful Separation of Paint and Wood. |
I knew I was to go home and learn how to create this 'illusion' myself. With a couple tools at hand, like a nappy-old brush, a dingy-coarse cloth, and a few random acrylic paints...along with a random wooden photo frame from the basement, my creative quest begins!
 |
| This Collection of Tools Cannot get any Simpler. |
In my first few attempts, I have come to know one thing: My usual obsession for perfection DOES NOT APPLY here! Fact. Be as carefree and as quick as you can with these easy steps. No judgement.
1. No matter the color of the existing frame- it is the color that will undertone the whole illusion.
2. With nappy brush, paint new color onto frame in direction of grain. Try not to coat paint too thickly as to cover the original paint completely. You want these layers to reveal one-another as you go!
3. Do you have a series of colors in mind? If so great. If not, just play. Try to imagine this piece being covered with a new layer of paint every 10 years or so...the colors will vary dramatically from one-another.
4. It is nice to have a fan blowing on paint as to 'quick-dry' it while you apply each layer. This 'fools' the paint into drying, which allows you to add new layers on to the 'kind-of-dry' paint. You don't want to actually let the paint settle and dry completely...so the fan is a great tool. Also, some layers may barely be added at all...simply by 'dragging' the brush over the previous color for a 'grain' effect. You are NOT trying to actually truly paint the frame with these layers- just providing the 'illusion' that they were painted and repainted at one point.
5. Keep in mind, some areas of the frame may be more heavily coated with a certain color. Treat all areas of frame as though Nature's aging hand has created these characteristics. (See below for 'layering effect' applied to frame. 3 colors used.)
 | ||
| Purple, Blue, and White Create the Layers Needed for the Illusion. Frame Originally Silver. |
6. As you work, start thinking about distressing the corners and edges of the frame with the blunt end of brush. Scrape paint off. Create scratches. You can use a scoring pad here too. All you're trying to do is remove old layers early in the process...that's why the fan is nice- it dries the thin coats of paint quickly for you so you can work through it.
7. Once all your layers have been added (hopefully revealing the layer under it nicely) take your dry cloth and start rubbing the corners and edges briskly. This is made easier because the paint layers have not completely dried through..."Thanks Fan!" This is also my favorite part because you get to create the age that you find appropriate. Damage the corners especially well...they are always taking the wear-and-tear the most. Where has this frame been? What trauma has it undergone? What's that huge gash from? Way too fun!!!
 |
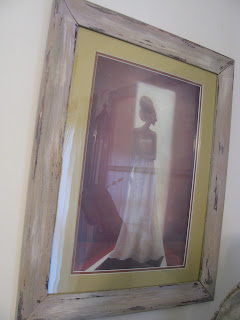
| This Frame Has a Subtle Effect- Appropriate for Art it Holds. Originally Glossy Oak. |
 |
| Black Frames with White and Mocha Tones Applied |
 |
| Once an Awful Glossy Cherry Frame...Now Sophisticated and Soft. |
I cannot wait to try this technique on a dresser or old chest!!! With as simple as the process has been, I want to try it on larger, more substantial surfaces next. I will need a Big Nappy Brush for that!!!
Age is a Beautiful thing that can only really exist through the hands of time. But to create the 'essence' of it yourself...it is a neat experience. After all, there is nothing wrong with playing little tricks on your home from time to time.
Cheers!
No comments:
Post a Comment